Node Setup using a Frontier (Dockerized Nodes)
Frontier (Dockerized Nodes) Setup:
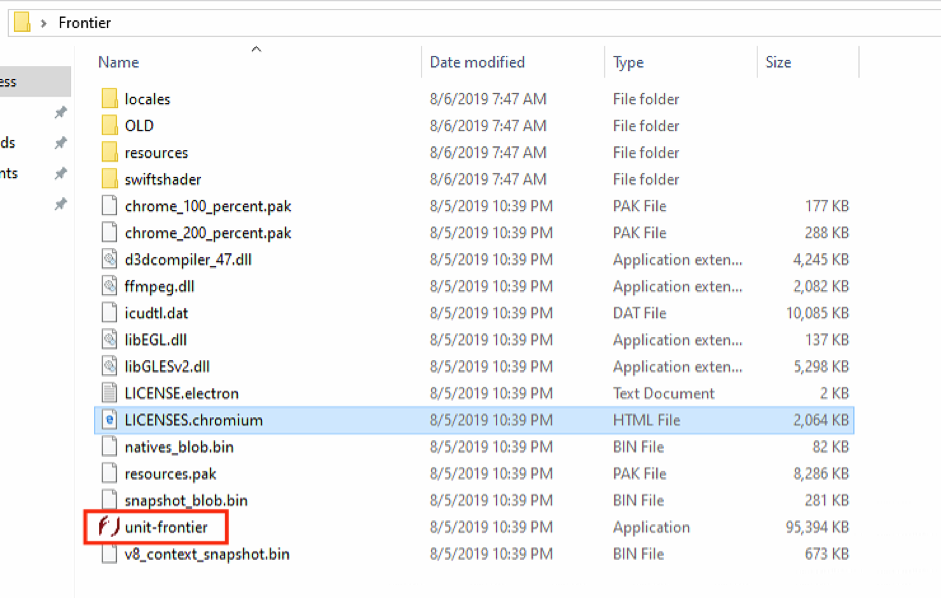
Download and unzip Frontier into some directory on your computer. After unzipping, execute unit-frontier.exe
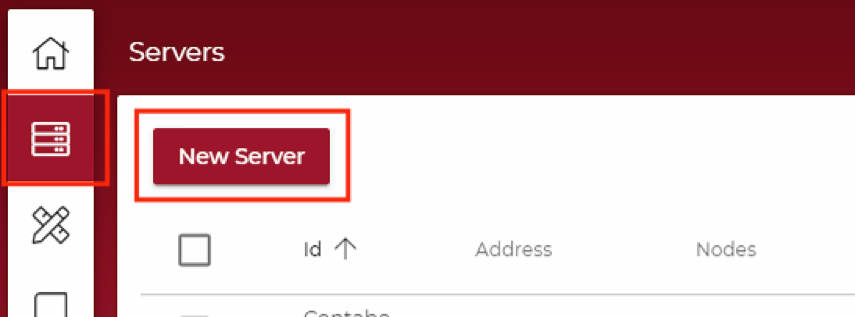
When opening Frontier for the first time, you will have to create a username and password that will be used to log into the application upon each launch. These credentials are ONLY stored locally on your computer. Once logged into Frontier, add your server by navigating to Servers > New Server
Give your server a name and fill out the root OR sudo-enabled credentials. You also have the ability to use certificates to authenticate (expert level)

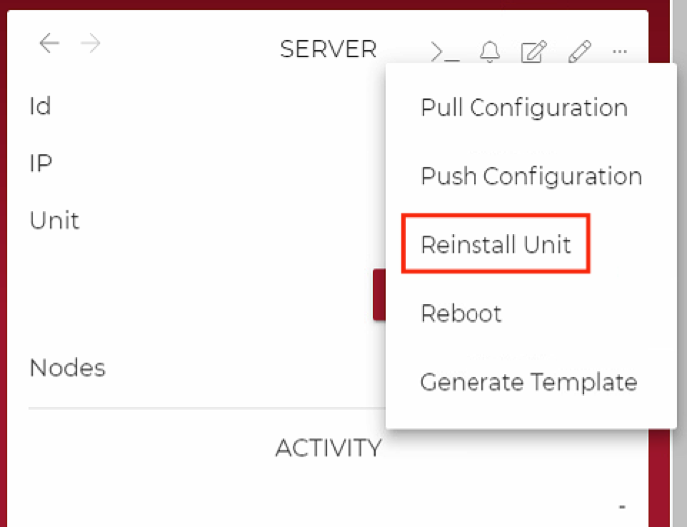
After having added your VPS into Frontier, you can install Unit on it by navigating over to Servers > Server Name > … > Reinstall Unit
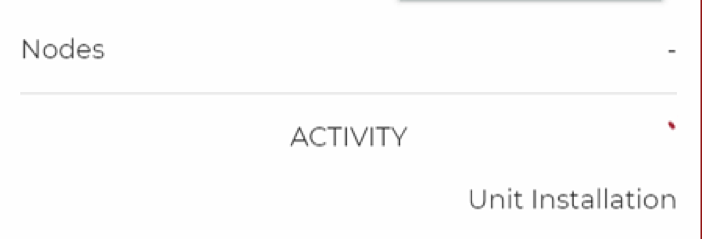
Unit will install and you can then start adding nodes and configuring their parameters and IP address binds.
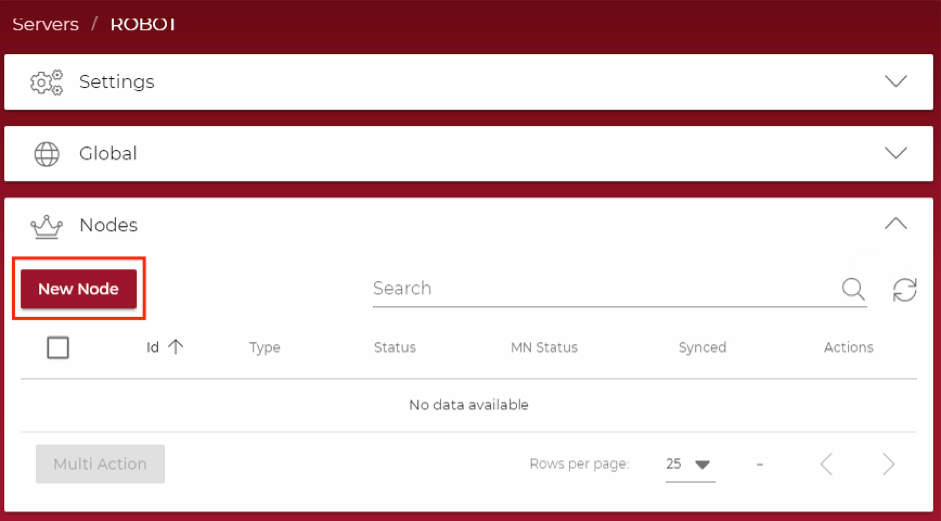
Add node by navigating to Servers > Server Name > New Node
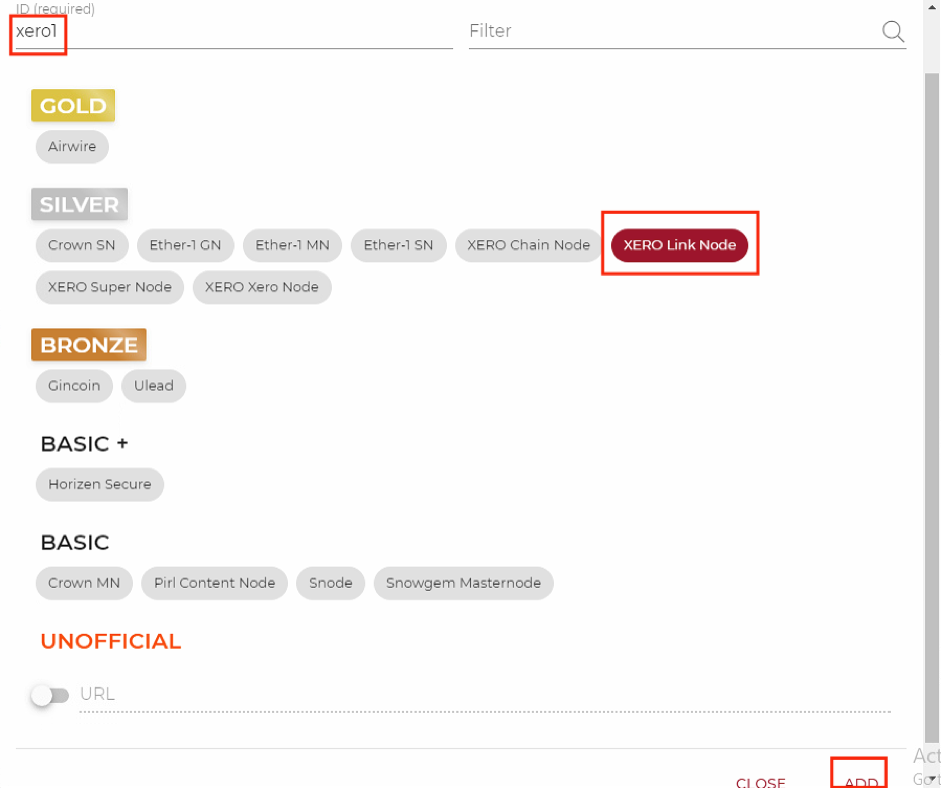
Fill out the Node ID, select your preferred node type and select ADD
Once your node is added, you will need to configure a few parameters like IP address, port binds and your stake address for status tracking purposes
First we will add the IP address parameterer by nagivating over to Servers > Server Name > Node Name > Paremeters > Ad
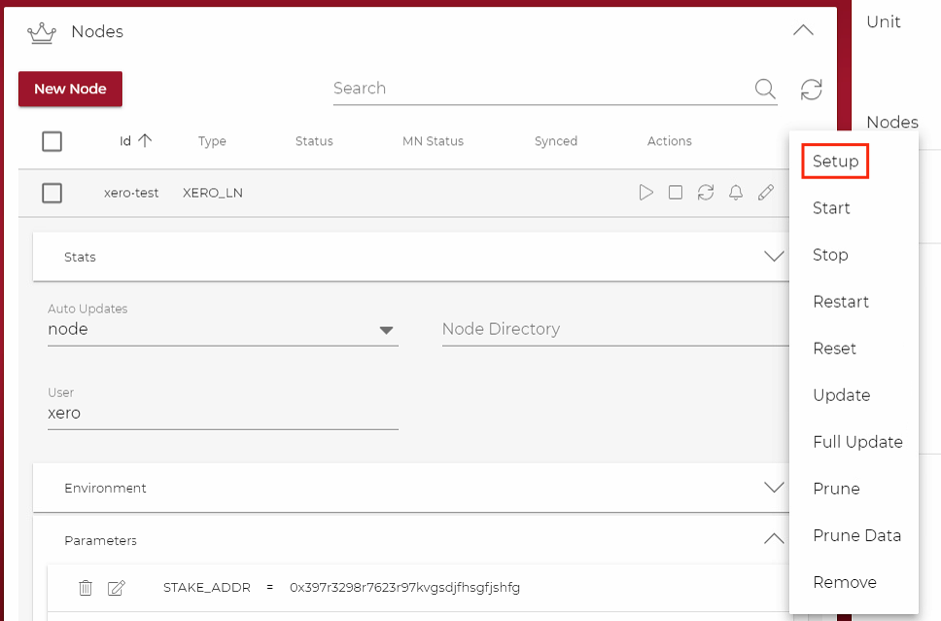
If you already have a STAKE_ADDR=XXXXXXXX set, you can edit it using the edit icon and inputting your wallet’s public address. If you don’t have the STAKE_ADDR= parameter you can add it using the ADD button. The final Parameters section should look like below. (note: Neither parameter has any empty spaces in the string)

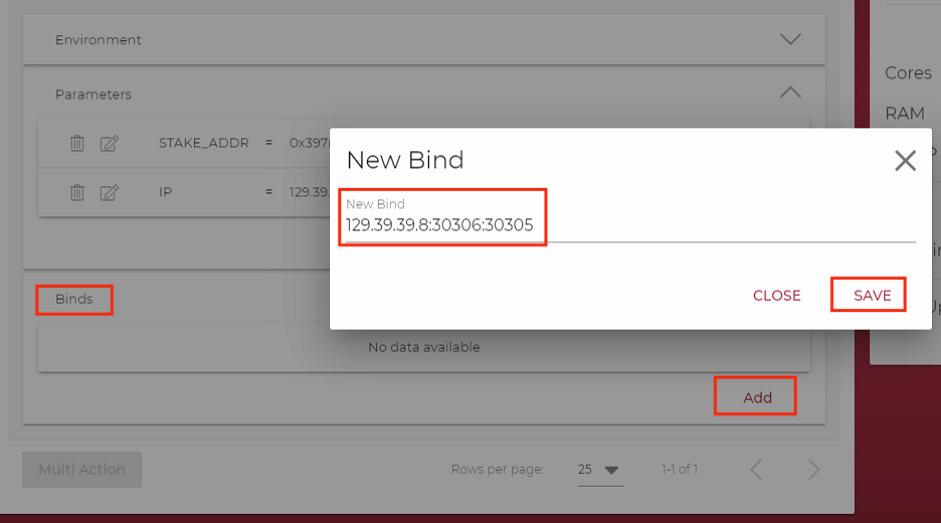
Now we need to set the binding of the ports for the public address you used for IP = Expand the Binds section and add the bind using the following format < Public_IP_Address:30306:30305 >
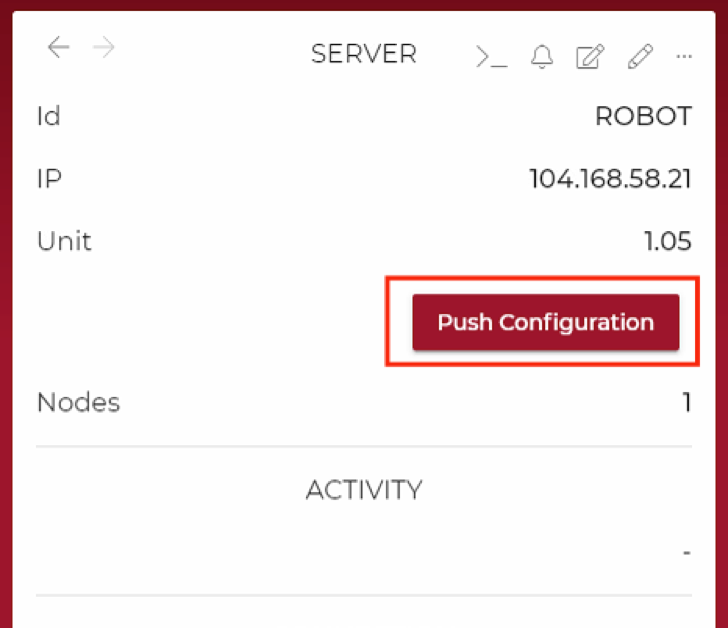
Now you’re ready to push the configuration over to your VPS by using the Push Configuration button
Once the configuration is pushed, we’re ready to setup the server on the VPS by hitting the … > Setup button
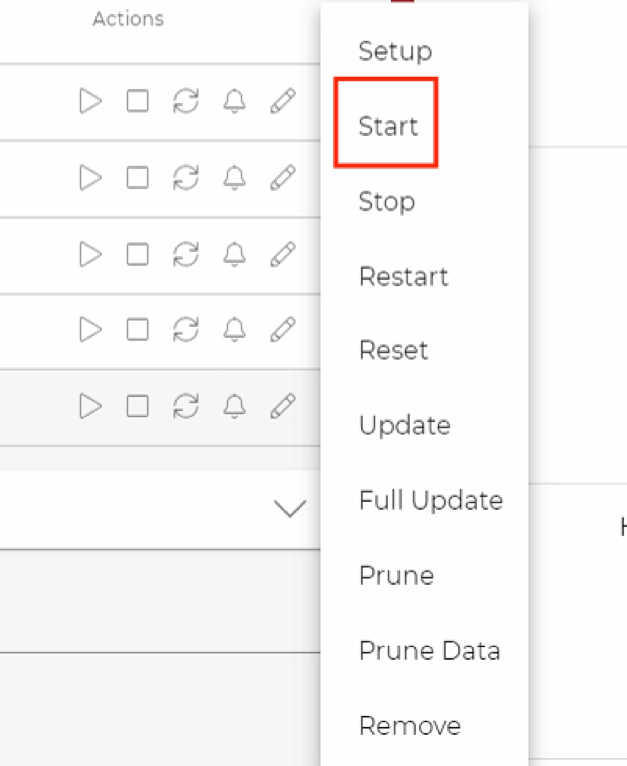
Node setup will take around 5-15 minutes depending on your VPS specifications. When setup is finished, you can start your node as shown below
You can monitor the node sync status by using the refresh button (shown below) and monitoring the blockheight in the Stats area (shown below)
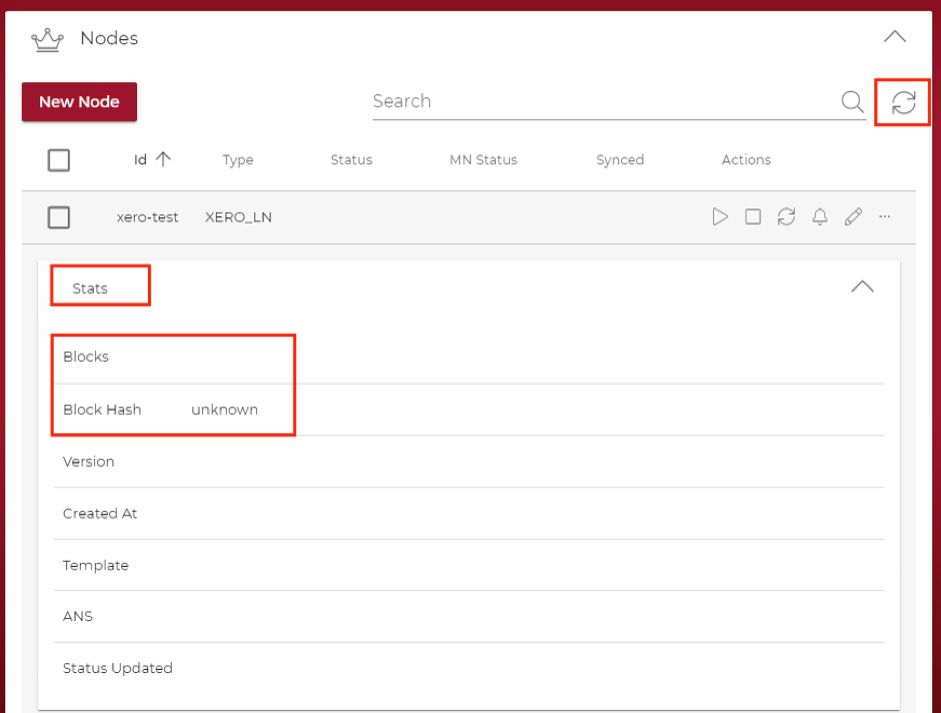
A properly added and synchronized node will look like the one below

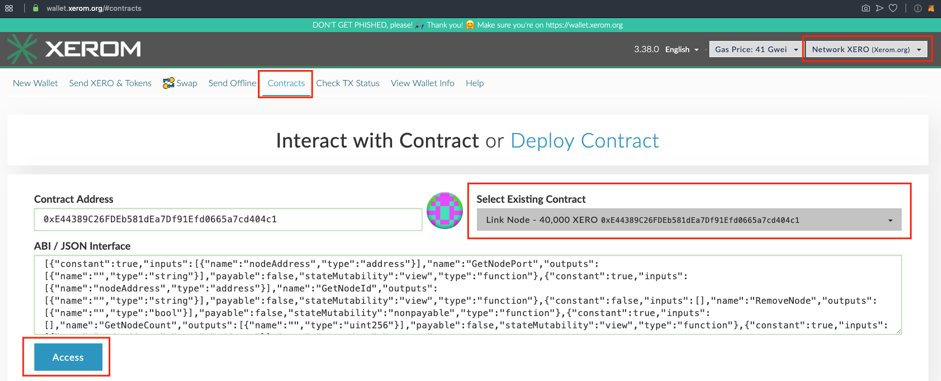
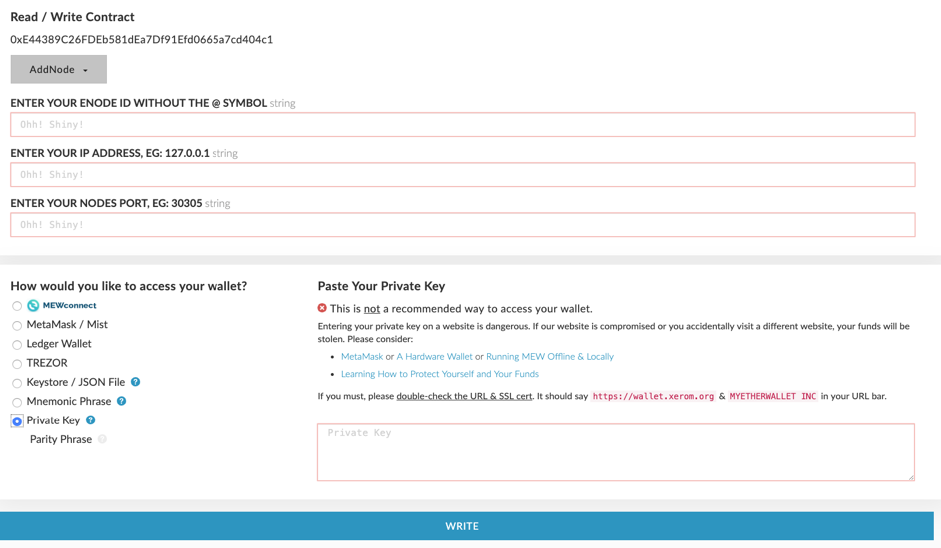
Now we’re ready to activate the node using the information from the STAKE_ADDR and the web wallet over at Our web waller
Select the Contracts tab, select the Xerom network, select the node type you’re activating and select access
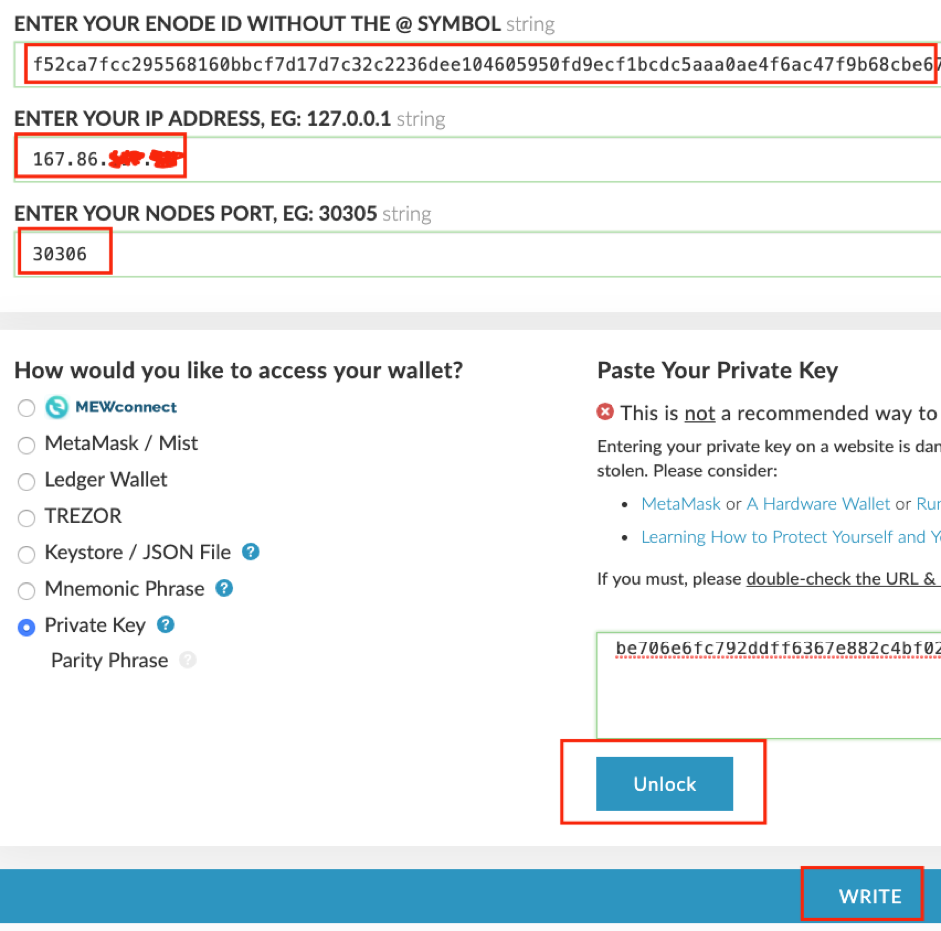
Fill out your ENODE ID, your public IP address, your port (always 30306), select private key (one which goes with your STAKE_ADDR/public address) and then hit, UNLOCK and WRITE
You can retrieve your ENODE ID by using Frontier’s SSH capability.

Navigate over to the /mns/< NODE_ID >/containers/< NODE_TYPE > directory and execute the ./enodeid app
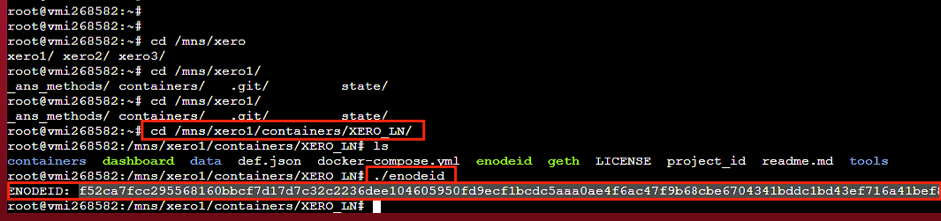
The ENODEID: string is the one you need to use in the previous step.
The fully filled out Contract registration looks like the one below
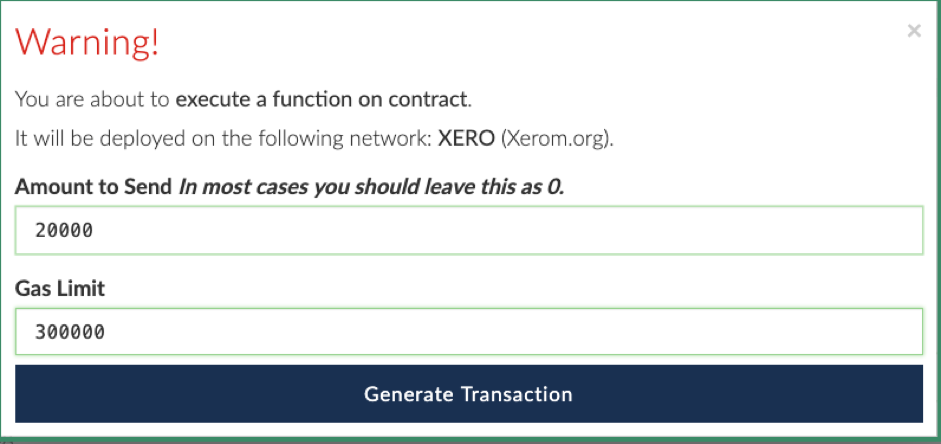
You will be asked to input the amount of XERO staked, provide gas for your transaction and then confirm it. Once this is done, your node registration is finished!
MAKE ABSOLUTELY SURE TO FILL OUT THE AMOUNT TO SEND AND HAVE IT MATCH THE NODE TYPE YOU’RE REGISTERING. BELOW THE EXAMPLE IS SHOWING THE AMOUNT FOR A XERO NODE REGISTRATION
Written By: Primate411
Node Rewards Per Block by Block Height
| Block Height | Chain Node Reward | Xero Node Reward | Link Node Reward | Super Node Reward |
|---|---|---|---|---|
| Block 1 to 1,999,999 | 0.4 XERO | 0.8 XERO | 1.2 XERO | 1.6 XERO |
| Block 2,000,000 to 3,999,999 | 0.6 XERO | 1.2 XERO | 1.8 XERO | 2.4 XERO |
| Block 4,000,000 to 4,999,999 | 0.8 XERO | 1.6 XERO | 2.4 XERO | 3.6 XERO |
| Block 5,000,000 to 6,999,999 | 1 XERO | 2 XERO | 3 XERO | 4 XERO |
| Block 7,000,000 to 8,999,999 | 1.2 XERO | 2.4 XERO | 3.6 XERO | 4.8 XERO |
| Block 9,999,999 to ∞ | 1.4 XERO | 2.8 XERO | 4.2 XERO | 5.6 XERO |